DIY Canvas Art

To say I have been lacking creativity lately would be a true statement. A few weeks ago I began working on some art for Hannah’s room, but didn’t feel inspired to finish them. I have learned from many failed projects that if I’m not into it I need to walk away and wait for my heart to be in it.


I penciled in my lettering first, then went over it with sharpie. The above picture is half way through my plumping phase. I simply add depth to the letters and make them pop more. And that is where I left it for weeks. Then yesterday I was inspired. 
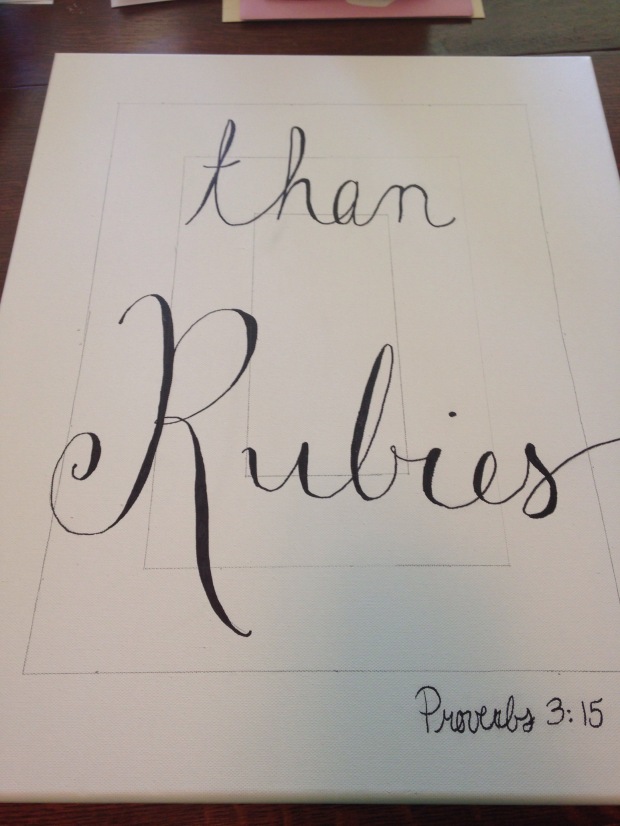

I decided to do a slight ombré effect. I penciled off sections 2 inches in from the edges (pictured above). Then I chose my two paint colors (white and deep pink). I mixed the colors half and half and painted the middle section. Then I split the mixed paint in half. One half I lightened by adding 2 tablespoons of white, the other half I darkens by adding 2 tablespoons of deep pink. I painted each section on either side of the middle section and continued to the edge. I then used a dry brush to blend the edges of each section (I forgot to take a picture at this stage…sorry).

This paint dried all day. In the evening I mixed white paint and water (equal parts) and painted from the center out to the edges. Then I used a dry paper towel to white wash the canvas. This lighted everything and pulled some paint off to give it a more rustic look (I used tempera paint for this purpose).

Sorry its sideways…


Then I let the canvas dry all night. In the morning I used a sharpie to go back over the lettering. Lastly I sealed it with a spray clear enamel. 


I love them and am so glad to get to mark something off of my to do list. 

DIY Flower Wreath

I love the idea of a mobile but don’t want Hannah to become dependent on stimulation to sleep (music, visual stimulation, etc.). I found several pretty flower mobiles on Pinterest and knew I could make one of my home. But then after playing with the idea of something hanging over the bed, I decided I liked a wreath on the wall behind the crib better. 

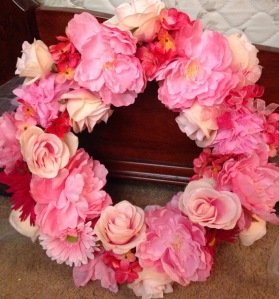
I used a floral foam wreath, hot glue, silk flowers, tulle, and a few floral pins. First I wrapped the foam wreath in pink tulle to give a better color which may peek through in some places. 


Then I hot glued silk flowers all over the wreath.


Then I attached a wall hanging mount to the back and hung it on the wall above Hannah’s crib.

DIY Hair Bow Holder

I am a Pinterest fan and have been finding fun projects for Hannah’s room for months now. I completed one of them this week and can’t wait to use it!

Materials:

  • Picture frame (11 x 14 or bigger)
  • Paint (optional)
  • Ribbon
  • Hot glue

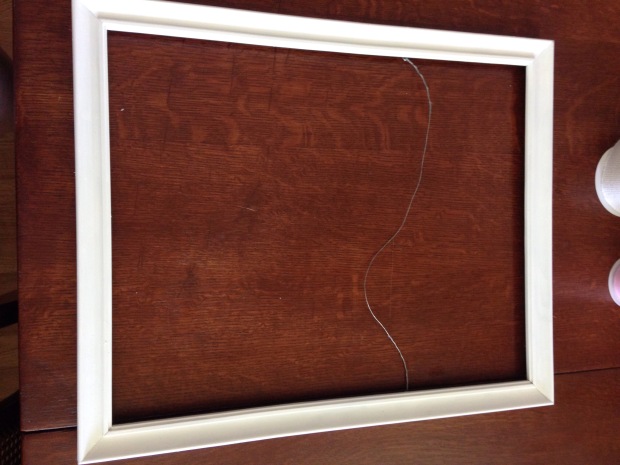
I used an old picture frame and simply removed the glass and backing. I then painted it to make it go with my color scheme. 


So then I gathered pink ribbons (I had plenty in my gift wrapping basket) and hot glued them to the backside of the frame. 


I then made a decorative knot for the corner of the frame and hung it on the wall. 


Super simple, and super cute!

Recharge, Paint, and Save Money

Everyone has different ways to recharge. Some people need to be around people, others need to be alone. Some need to be creative, while others need mindless activities. After a week of testing, I was looking forward to a morning alone with my worship music playlist and painting Hannah’s room. That is how I recharge: alone, worshipping God!

I’ve always heard that you shouldn’t pay someone to do something you can do yourself. And when you have no money, like us, this is especially true. I have been painting rooms with my mom for as long as I can remember. It is super simple and just takes a few quick and easy steps.

  1. Clean your trim work. If it needs to be repainted, this is the time for that.  
  2. When the trim is dry from being cleaned, or completely dry from being painted (at least 24 hours), use painters tape to cover all trim edges. Remove light plate switches and outlet covers. Now you are ready to paint.                 
  3. I like to paint one wall at a time in this order: edges, corners, everything else. I use a flat padded tool for edges, a brush for corners, and a roller for everything else.                                                                                        
  4. After the entire room is painted, wait about one hour for everything to dry. Then go back and look for places that need a second coat or touch up. Make sure to get close to the walls and look for speckles that are not your paint color.  
  5. After another hour, remove the painters tape. Do this at about a 45 degree angle for best results. You may find that some spots need touching up. Use a small paint brush for these.
  6. I like to wait a full day before putting my furniture back, but not everyone has that much time.

So not only did this task save us money, but it gave me a chance to recharge and love on my sweet girl before she arrives!


New Blog Signature

Making Something For Her

We have been so blessed by family in the way of furniture for the nursery. Years ago my aunt and uncle gave us their entire nursery bedroom set and my grandmother gave me an old glider. I have learned to always accept the freebies and modify them to suit your style and needs. 

Over my spring break, I refinished the glider and covered the cushions. New cushions can be up to $150 and I was not about to pay that price. A new glider can be three or four times the price of new cushions! I didn’t love the oak finish of the glider or the terrible blue fabric of the cushions, so I changed them (knowing that my grandmother was fine with whatever I did to them-always ask people if they mind!)

I used a spray paint primer on the wood frame of the glider. I didn’t sand anything. Just wiped it down with a damp rag, let it dry, and sprayed a thin coat.

  Then I was able to use a satin finish, white spray paint (about 2 cans) to coat the chair. This takes time because you have to be willing to do thin layers of paint and let them dry in between. 
I finished the frame by spraying a clear, high gloss enamel over the entire frame. 

For the cushions, I bought 2 1/2 yards of upholstery fabric. I chose something girly because I’m having a girl! I folded the fabric so there were two layers and placed the cushions on top of the fabric. I then left about a 4″ edge around each cushion when I cut the fabric (for thickness of the cushions and wiggle room getting the cushions in). I sewed up three edges for both cushions with my sewing machine. I used a wide zigzag stitch to make it more secure. Next, I put the cushions in the fabric and hand stitched the fourth edge (back side of the seat cushion and bottom side of the back cushion).

I made straps for attaching the cushions out of the left over fabric, but you could also use a thick ribbon for this.   

Ta-Da!!! My glider now looks brand new, girly, and it cost me $23 in fabric, $16 in spray primer, paint, and enamel, and two partial afternoons of time!

New Blog Signature